![[WP Import] How to migrate from Amazon Vendor to Seller Central (and when to use both)](http://images.ctfassets.net/q17uls4wkkdz/40LAA3Nb01PxaQRZ1GiaiS/bc8cc6eb6faac410c417cb795c27114b/19-05-22_How_to_migrate_from_Vendor_to_Seller_Central_ft_image_800x500.png)


Amazon is complex, mysterious, and constantly evolving. So when it stopped sending purchase orders to thousands of brands earlier this year, rumors spread like wildfire about what its motive could possibly be. Was a “one vendor” system combining both Seller and Vendor Central right around the corner? Whatever the motive, Amazon’s move left many vendors questioning what to do next.
The fact is, Amazon hasn’t formally announced any change to Vendor Central. Aside from the cancellation of purchase orders for many vendors, the idea of a “one vendor” system remains speculation.
But with purchase orders at a standstill, along with the frustration from chargebacks and weak communication with support, vendors are choosing to act. Thus, more and more brands are looking to Amazon Seller Central - and third-party selling - as a solution.
If you aren’t yet familiar with the difference between Seller and Vendor Central, you might want to have a look at this article for an in-depth explanation. If you’re short on time, here’s a quick sum up.
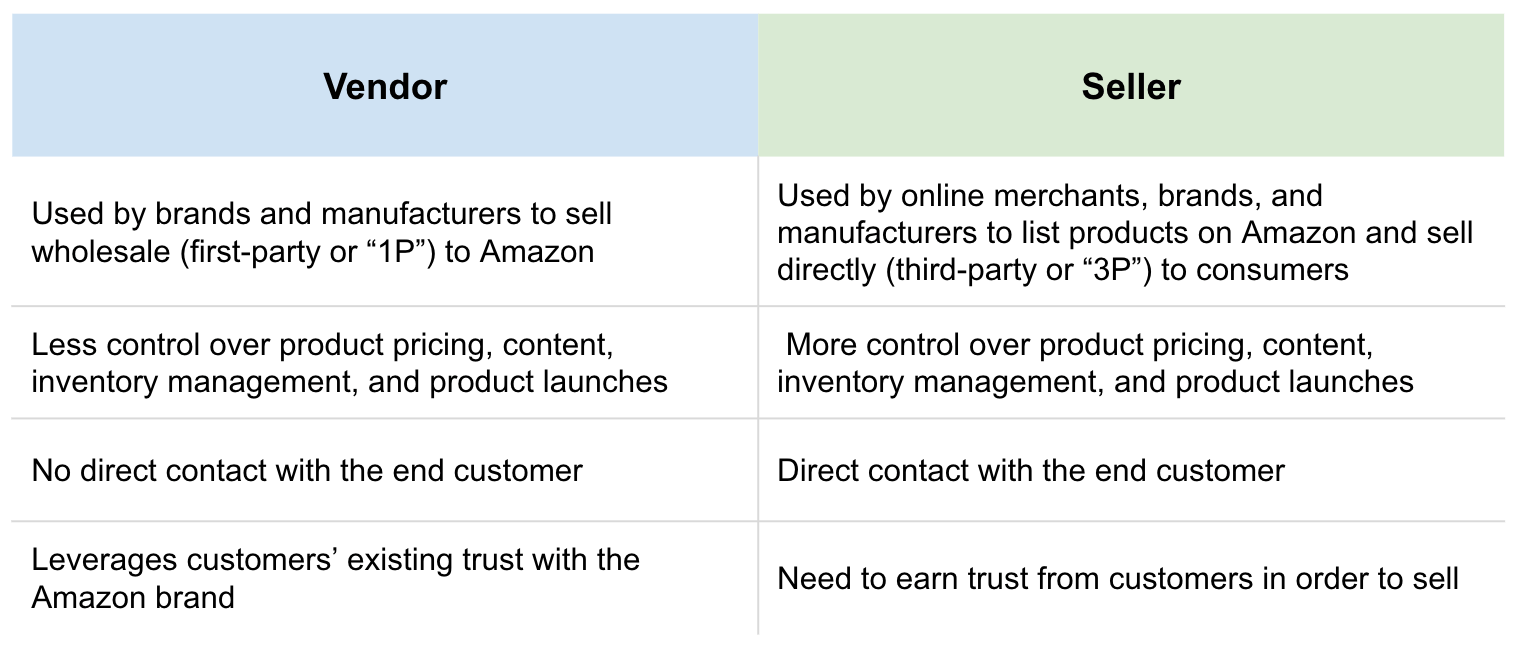
While there are benefits to both, the fact is, Seller Central allows users more control over key business operations and allows sellers to set more of their own rules. This is exactly what many brands are looking for right now, particularly because of the revenue uncertainty that currently surrounds Vendor Central.
Many brands these days are looking for more control over business operations. This is why they’re looking at Amazon Seller Central.
So what can you do?
For vendors who’ve had their purchase orders canceled, a complete switchover to Seller Central is likely required in order to maintain a presence on Amazon. For those who are still receiving purchase orders but are feeling uncertain about the future, the hybrid approach may be the fix. In either case, both are great options for Amazon vendors seeking more control and security.
Now, let’s walk through both options, how they work, and how to make the move seamless.
How to make a complete switch from Vendor Central to Seller Central
So you’ve received an unfortunate notification from Amazon notifying you of the cancellation of purchase orders. Maybe the situation is confusing, or you’re angry about having lost a vital revenue source or frustrated in general. You don’t really know what to do next, but you know you need to do something in order for your products to stay relevant on Amazon. Perhaps you’re considering Amazon Seller Central, but you aren’t quite sure how it would work. Maybe you’ve never even sold directly to customers before. Don’t stress. Your team can make this switch and keep on selling.
Here is a step-by-step list of what you’ll need to do to seamlessly switch from Vendor to Seller Central.
Step 1. Inform your Vendor Manager
Even if Amazon has canceled all of your purchase orders, you still have a contractual agreement with them as a vendor. Therefore, you need to let them know that you will be moving your operations away from Vendor Central and towards Seller Central.
Step 2. Create a Seller Central account
Unlike Vendor Central, Seller Central is open to the public and creating an account can be as easy as following this link. There are also significantly fewer steps in place here, and no contracts or business discussions involved, so don’t be afraid to dive right in!
Step 3. Choose a fulfillment option
You now need to decide how you will get product orders to the end customer. The best option here for volume sellers is FBA (Fulfillment by Amazon). With this option, your products are stored in an Amazon warehouse. Once a transaction takes place, Amazon takes care of the fulfillment process, which includes the shipment of purchased products to your customers. If you’re not too familiar with after-sale customer service (dealing with returns, exchanges, etc.) this is an excellent choice, as Amazon takes care of it for you.
Step 4. Set your product pricing
As a seller, you have complete control over the pricing of your products. As a vendor, this wasn’t the case, which makes this a great new opportunity for your business. With this added control, keep a close eye on the pricing of your competitors, as too high of a price means loss of sales and too low means low ROI.
Being a seller also means that you are now responsible for considering things like sales tax. If you are a seller based in the US using FBA, tax rates differ from state to state.
Step 5. Manage your inventory
Inventory management is taken care of by Amazon on Vendor Central, but, as a merchant, you now need to keep track of product counts and stock levels on your own.
Step 6. Manage product content
At the end of the day, Vendor Central and Seller Central are very different platforms, so the product content you uploaded into Vendor Central won’t automatically be available in your Seller Central account. Instead, Seller Central relies on inventory file templates, which you can find here. These are essentially category-specific files that contain all product attributes from products you want to be listed on Amazon Marketplace. The benefit here is that these can be imported directly via an API connection, allowing you to always keep your product content, pricing, and availability current and up-to-date.
Step 7. Consider advertising options
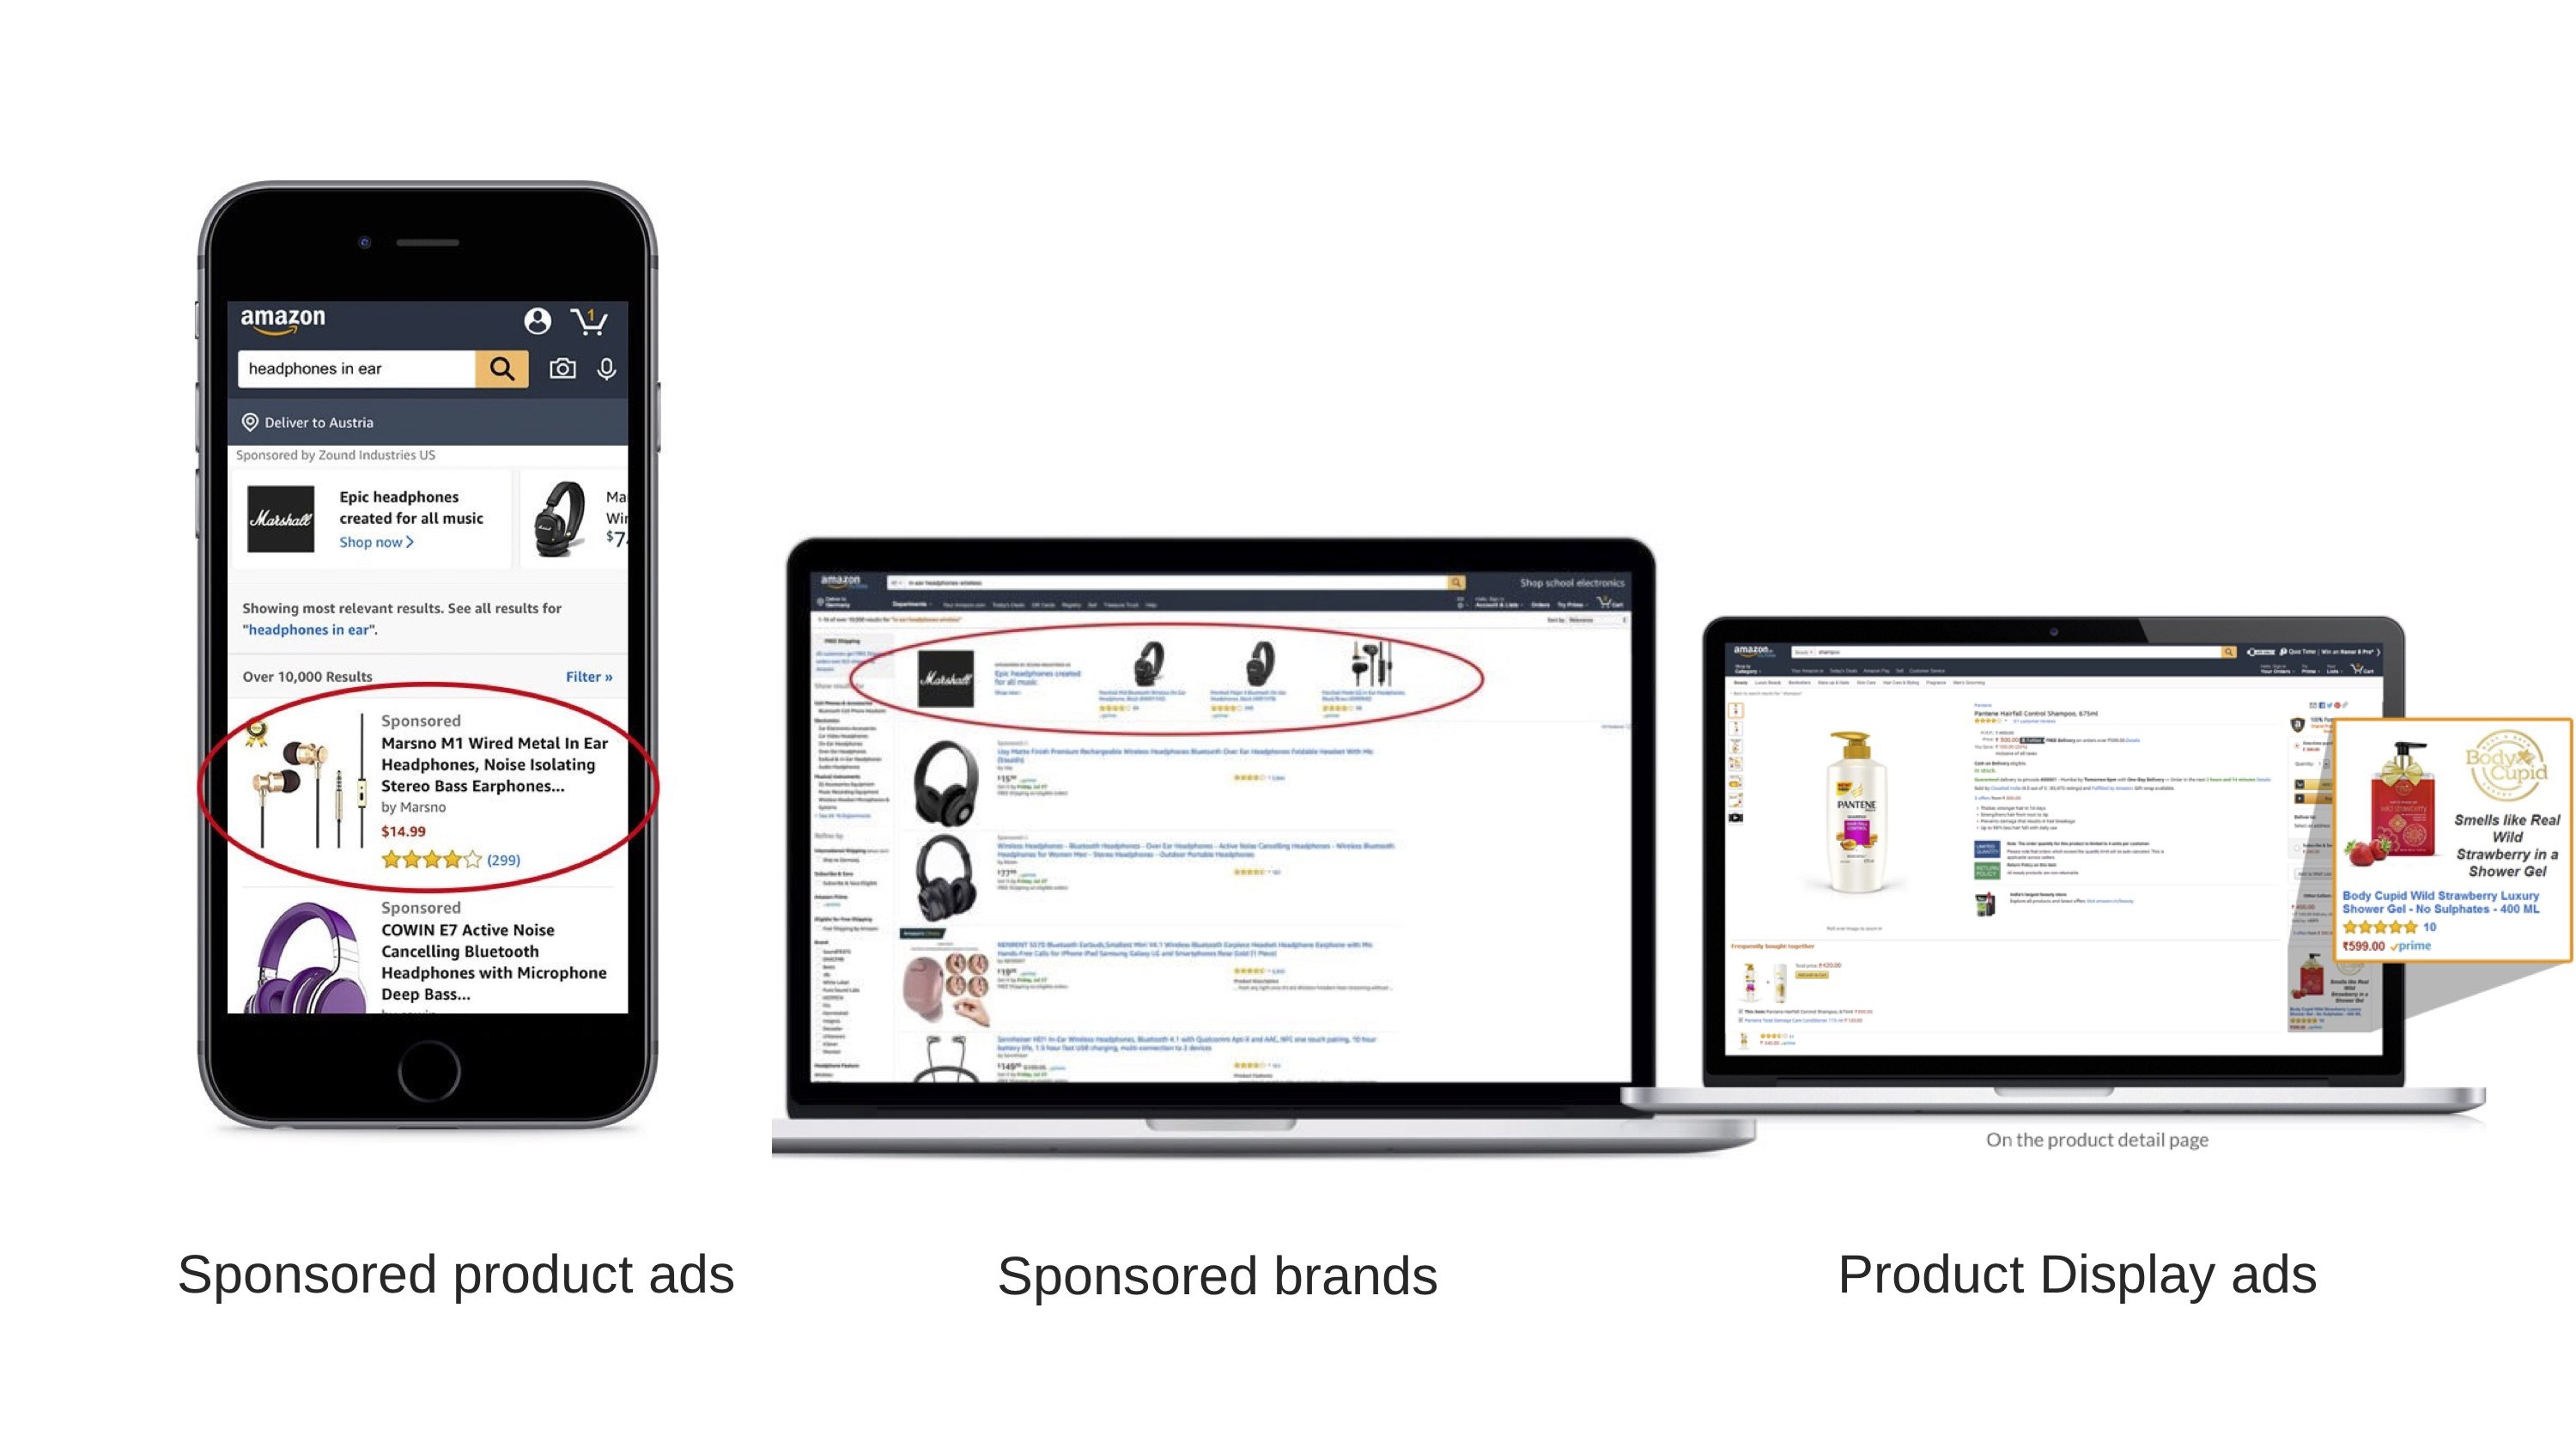
Most advertising options that are available to vendors are also open to sellers. For some vendors, Amazon takes care of all product-related marketing on its marketplace. As a seller, this is now in your control. Consider looking into how Amazon Advertising can help boost your product visibility.
Step 8. Monitor performance analytics
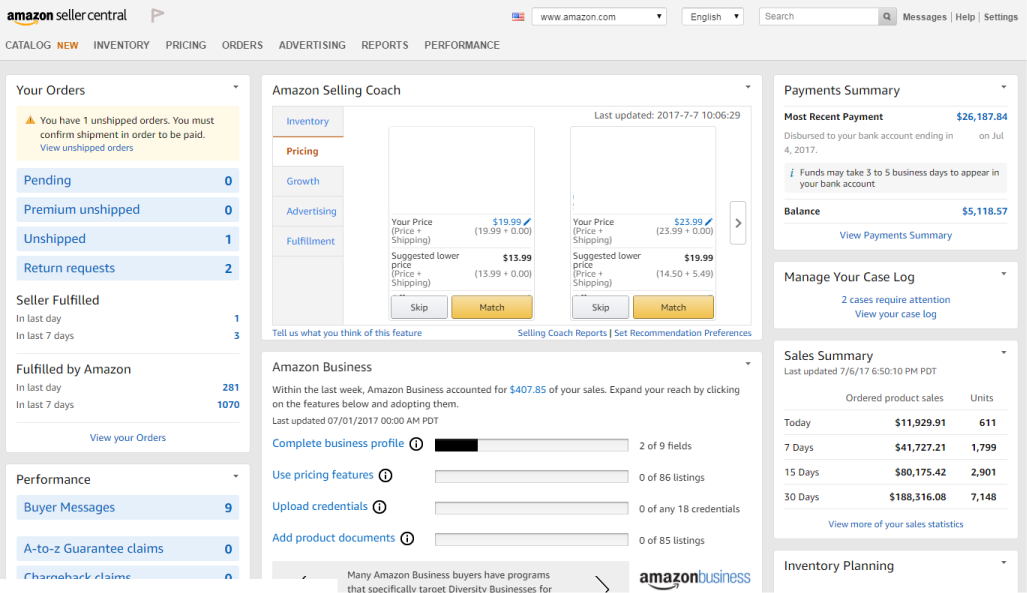
Selling third-party on Amazon gives you full control over your products, as well as their performance. For this reason, Seller Central offers better quality analytics and at no extra cost. You can now gain easy access to information like page views, conversion rates, session length, and more. This information can then be used to help you optimize your product listings.
Things to consider
As a seller, you are responsible for protecting your own brand. Why? Because the last thing you want is for unauthorized sellers to be listing counterfeit or low-quality versions of your own product.
The best way to stop unauthorized selling is by enrolling in the Amazon brand registry. Let’s take a closer look at what this is and how it can help you make a more seamless switch from Vendor to Seller Central.
Amazon brand registry
Only one product listing (product detail page) is permitted per unique ASIN on Amazon. This means, not every seller has control over the type of product information provided on a given listing. For brands and manufacturers, this used to mean not having control of the product content for their own products. To solve this issue, Amazon introduced their brand registry.
The benefits of enrolling are:
- More control over the information on product pages that use your brand name
- Access to search and reporting tools that help you more easily and quickly identify potential cases of brand infringement
- Predictive protections from Amazon to identify and remove potentially inaccurate or low-quality product listings associated with your brand
Gated ASINs
Gated ASINs are products that Amazon has temporarily blocked third-party sellers from listing on its marketplace. This means certain products can only be listed by some sellers or when they become high demand. This status, however, is not permanent, which means you may be able to list the product in the future. If you find that Amazon has gated your ASIN as a brand, you will need to open a case with them and request for the product to be ungated.
When to use the hybrid approach (leverage both Seller and Vendor Central)
An alternative to making the complete switch to Amazon Seller Central is to maintain accounts on both platforms. This technique is also known as the “hybrid approach”. This option is ideal for vendors who:
- are still fulfilling purchase orders on Vendor Central
- want to list seasonal products or ones that Amazon doesn’t sell on its retail channel
- want a backup plan to fulfill orders in case Amazon mistakenly sells more items than they have in stock
- are worried that Amazon may soon cancel or send fewer purchase orders
How to get started
If you like the idea of leveraging both platforms and want to get started, the first step is to talk to your Vendor Manager to seek approval. Since you’ll still be fulfilling purchase orders and benefiting from Vendor Central, you’ll want to keep up a healthy business relationship with Amazon.
For the same reason, be extra careful about which products you list as a seller. If you end up listing the same product as Amazon has already listed on your behalf, they may not be happy and you will essentially end up competing against yourself.
Lastly, even if you are still using Vendor Central, you will be in charge of maintaining your Seller Central account. Check out steps 2-8 listed in the above section for detailed information on how to get started with Seller Central. You’ll also be in charge of ensuring that sure your products are performing well and that your brand is protected.
Conclusion
At the end of the day, only you can decide if a complete switch to Seller Central or the hybrid approach, continuing to use both Seller and Vendor, is best for your business. Don’t forget, no matter which path you take, you are taking the necessary steps in future-proofing your business on Amazon. Not only will your product visibility remain but you’ll also gain more control of it.
Ready to get started on Amazon Seller Central? Contact a Productsup Client Partner to help make the switch seamless, efficient, and worthwhile. In the meantime, download your free copy of our complete guide to Amazon Marketplace for third-party sellers!
About the author
